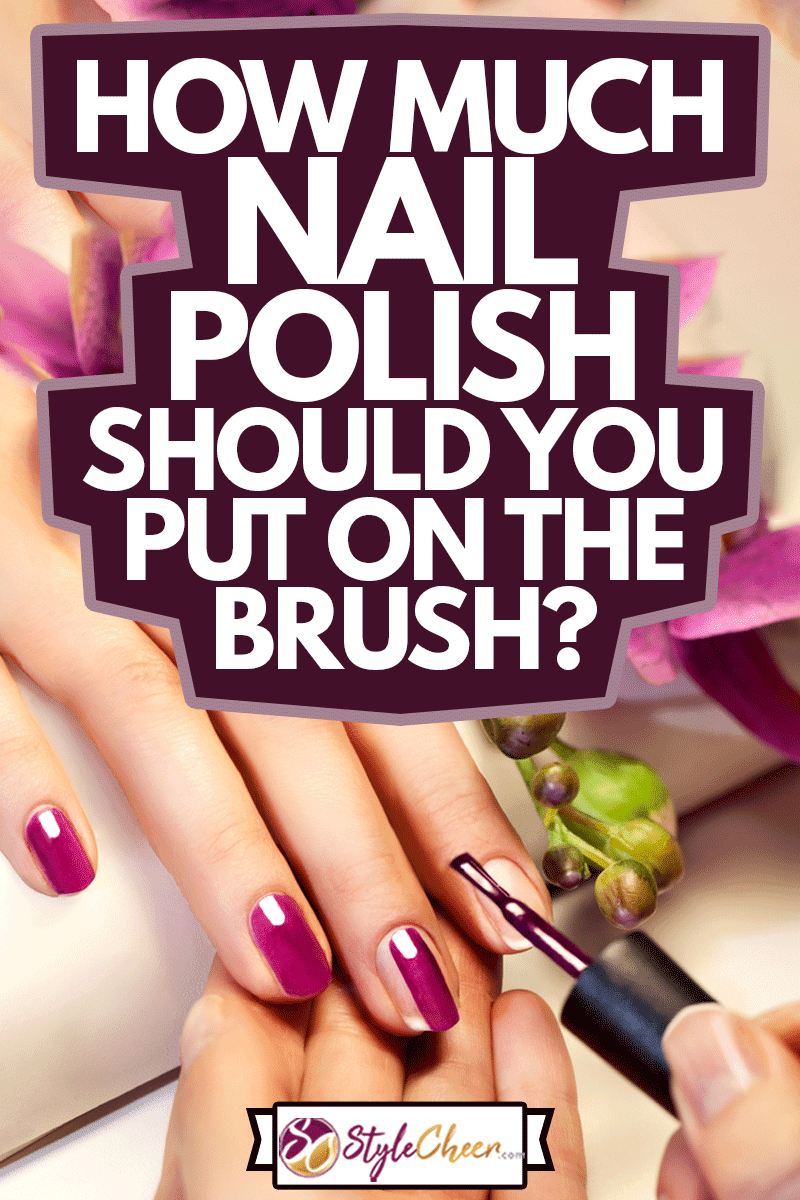
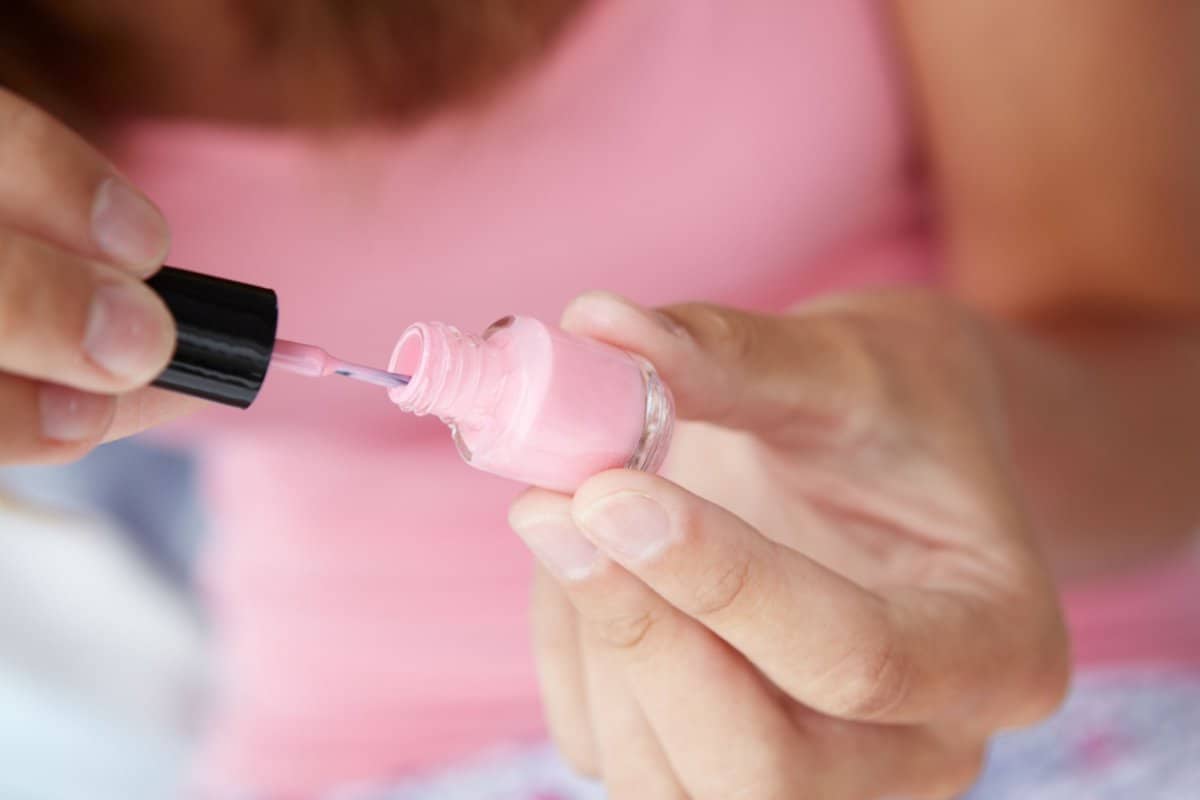
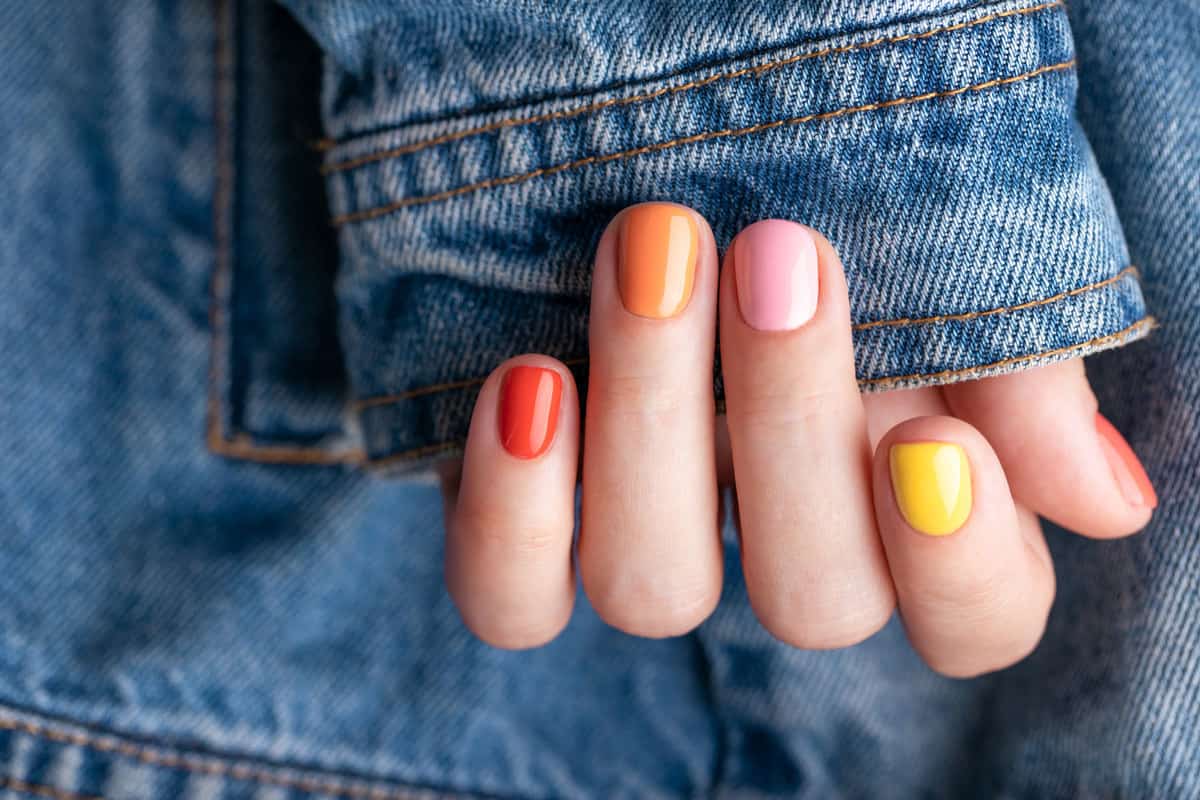
Nailing a salon-quality manicure at home means mastering how much polish to load on your brush. Ever wondered about the secret to just the right amount? We've dug into expert advice to guide you.
This article may include affiliate links and elements that were carefully created by our team using advanced ai to help you envision the best style advice.
The trick is to have enough polish on the brush for a thin, smooth coat across the nail in three strokes without overloading. Thin layers mean quicker drying and a sleek finish, while too much polish leads to a messy, thick layer prone to issues.
For tips on perfecting your brush technique and achieving that salon-fresh look at home, keep reading.
What is the correct way to apply nail polish?
According to expert nail stylists, there are steps to a perfect at-home manicure. It's tempting to omit the prep work to save time, but skipping any of these steps may leave you with less than favorable results. Each phase has a purpose in the process.
1. Prep Work
Cuticles
If your cuticles are in poor shape, it will affect how your manicure looks. Even a perfect nail job surrounded by ragged cuticles isn't attractive.
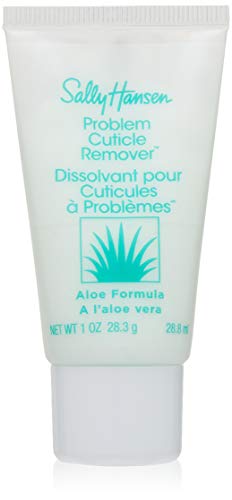
Before a manicure, you want to use a cuticle remover. This product is not the same as cuticle oil, and you should use the two differently at separate times. A cuticle remover exfoliates the cuticle bed while oil moisturizes it.
Apply a small amount of the remover and let it settle into the cuticle so it can dissolve. Then, use an orange stick to push back the cuticles gently. Avoid cutting your cuticles unless they are in terrible shape, and it's unavoidable.
For a top-rated cuticle remover, try this one from Sally Hansen.
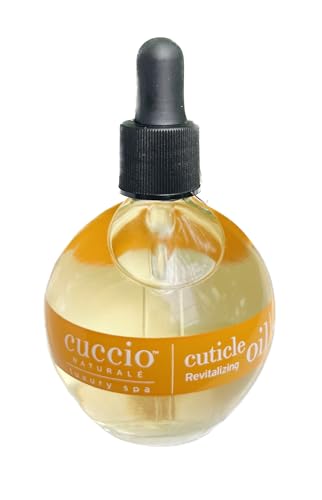
If you struggle to keep your cuticles in great shape, you should invest in quality cuticle oil and use it in the days to follow as part of the maintenance process. Even if you aren't wearing polish, you should give your cuticles some TLC.
If you are looking for a cuticle oil to try, consider this revitalizing oil by Cuccio recommended by the experts.
2. Clean Nails
It's essential to start the process with clean nails. If there's any old polish, use nail polish remover. It will also remove any dirt and oils. If you don't have any old polish on, you still need to remove the oils. In this case, you can use regular isopropyl alcohol, commonly called household rubbing alcohol.
Many people use cotton balls, but that can leave behind strands of cotton that can ruin your polish. Consider using a makeup sponge or a lint-free towel that won't leave behind any particles.
Buffing
Clipping and filing your nails is standard practice before painting your nails, but many people forget to buff their nails. Buffing removes any ridges in your nail bed, giving you a smooth surface. It also helps remove natural oil residue buildup, which can dull your nails and damage your manicure.
3. Exfoliate and Moisturize
Don't ignore your hands, wrists, and forearms. Take a bit of extra time and pamper them too. Apply a hand scrub to exfoliate dead skin cells. After washing, rinsing, and drying your hands, use a good moisturizer on your hands and cuticles.
After this step, be sure to clean the nails again with either nail polish remover or alcohol to remove any residual oils from products.
4. Base Coat
Don't skip the base case coat. It protects your nails from color soaking into the nail bed, which can leave them stained and discolored. It also gives your nail polish something to adhere to, akin to laying a foundation.
If your nails already have some damage, use a fortified base coat that will help repair your nails.
5. Nail Color
Choose a nail color that is fresh and flows easily. Older polish tends to get thick and is harder to use. However, if you have a favorite polish that you can't part with yet, add a drop or two of pure acetone to thin it down. This trick should get you a few more manicures out of the bottle.
Don't shake the bottle or pump the wand. Both can lead to air bubbles in your nail color, which can cause holes in your nail polish layers. Speaking of bubbles, full guide here: My Nail Polish Bubbles—What To Do?
To get the polish well mixed, gently roll the bottle between your hands to get it warmed up and flowing.
Apply color using thin layers starting in the middle and then down each side. Get as close to the cuticle as possible. Try not to lift during each stroke. Don't forget to paint the tip to seal the color.
Using too much polish and too many strokes are common mistakes to avoid. Wait until each layer is dry before adding another. Try to use no more than three coats.
6. Top Coat
The top coat seals your nail color and helps protect it. Apply a thin layer to the nail bed and the tip of the nail for optimal protection. You may want to apply a second coat once the first layer has completely dried.
Top off your nails with a layer of quick-dry top coat every few days for a touch-up. This extra step will add back shine and reinforce the protective layer.
7. Clean Up
Clean-up is the final step, but skipping this one can leave your nails looking messy. Make sure any stray nail polish that has gotten onto your fingers or cuticles is gone.
Be careful during this step. If you rush, you may remove some polish from your nail and have to repair it. The best practice is to use an angled makeup brush dipped in nail polish remover.
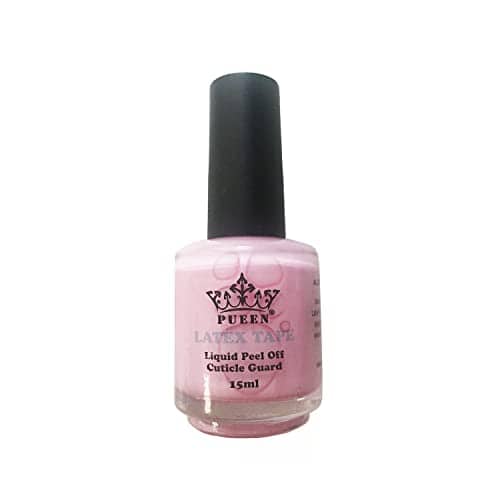
If you find that you can't seem to paint your nails without getting it all over, especially while painting your dominant hand, you might want to consider using peel-off liquid latex.
Apply it on the skin around your nails up to the cuticle and let it dry. When you finish painting your nails, gently peel off the latex, and any stray nail polish will come off too.
If you are interested in trying this product, this liquid latex tape from Pueen is highly rated.
How thin should nail polish coats be?
According to expert stylists, you want enough color on your brush to cover your nail in three strokes: one down the middle and then another on each side.
You only need to get enough polish on the brush to do one nail at a time. Wipe off excess by running the nail wand over the inside rim of the bottle.
The nail color only dries well when the layers are thin. Don't worry if it looks too thin or the color isn't dark enough. The second coat will add coverage and deepen the color. If it's still not enough, add a third thin layer.
It's much better to work in multiple thin layers than to try to put on thick layers. Too much polish and the color won't dry properly. Then the polish will clump and smudge, leaving you with messy nails.
How do you avoid brush strokes when painting nails?
Some nail colors, especially metallics, iridescent, and pearlescent colors, are prone to brush strokes. While you may not eliminate brush strokes, there is a hack to fix them.
Using a makeup sponge to apply the last layer of color will cover and heal any brush strokes from previous coats.
Clip off a small section of the sponge and use tweezers to handle it. Paint the end of the sponge with the nail wand. Then use the tweezers to gently dab it onto your layer of nail color until the streaks are blended out. Voila! No more unsightly brush strokes.
How do you apply nail polish perfectly?
If you want nails to look like those you would get from the salon, you have to follow the same process as the professionals. Do your prep work and use a base coat and top coat in addition to your nail color.
It takes time, but it's worth it. Be sure to let each layer dry for at least two minutes before applying the next one. It's tempting to rush the process and omit steps, but you will find that the results won't be the same.
Check here for more tips: Should You Let Nail Polish Dry Between Coats?
To see a video about how to get perfect nails, check out this YouTube video:
How to make nail polish last longer on natural nails?
Complete all the steps recommended by the professionals for an at-home manicure, and your nail color should last whether your nails are natural or not. Don't forget to touch up every few days with a quick dry top coat for added protection.
Also, remember to protect your nails with gloves when doing outside and household chores that can damage your color. Even the best professional nail job can't endure hard abuse.
Perfecting Your Polish Application
Too much paint on your nail brush may ruin your at-home manicure. Thick layers lead to bubbles, smudges, and peeling, which means a redo will be needed. You only need enough nail color to cover one nail at a time with a thin coating. Once dry, apply more if needed.
Share this guide with your friends to help them too! Pin the image below on your social media sites.